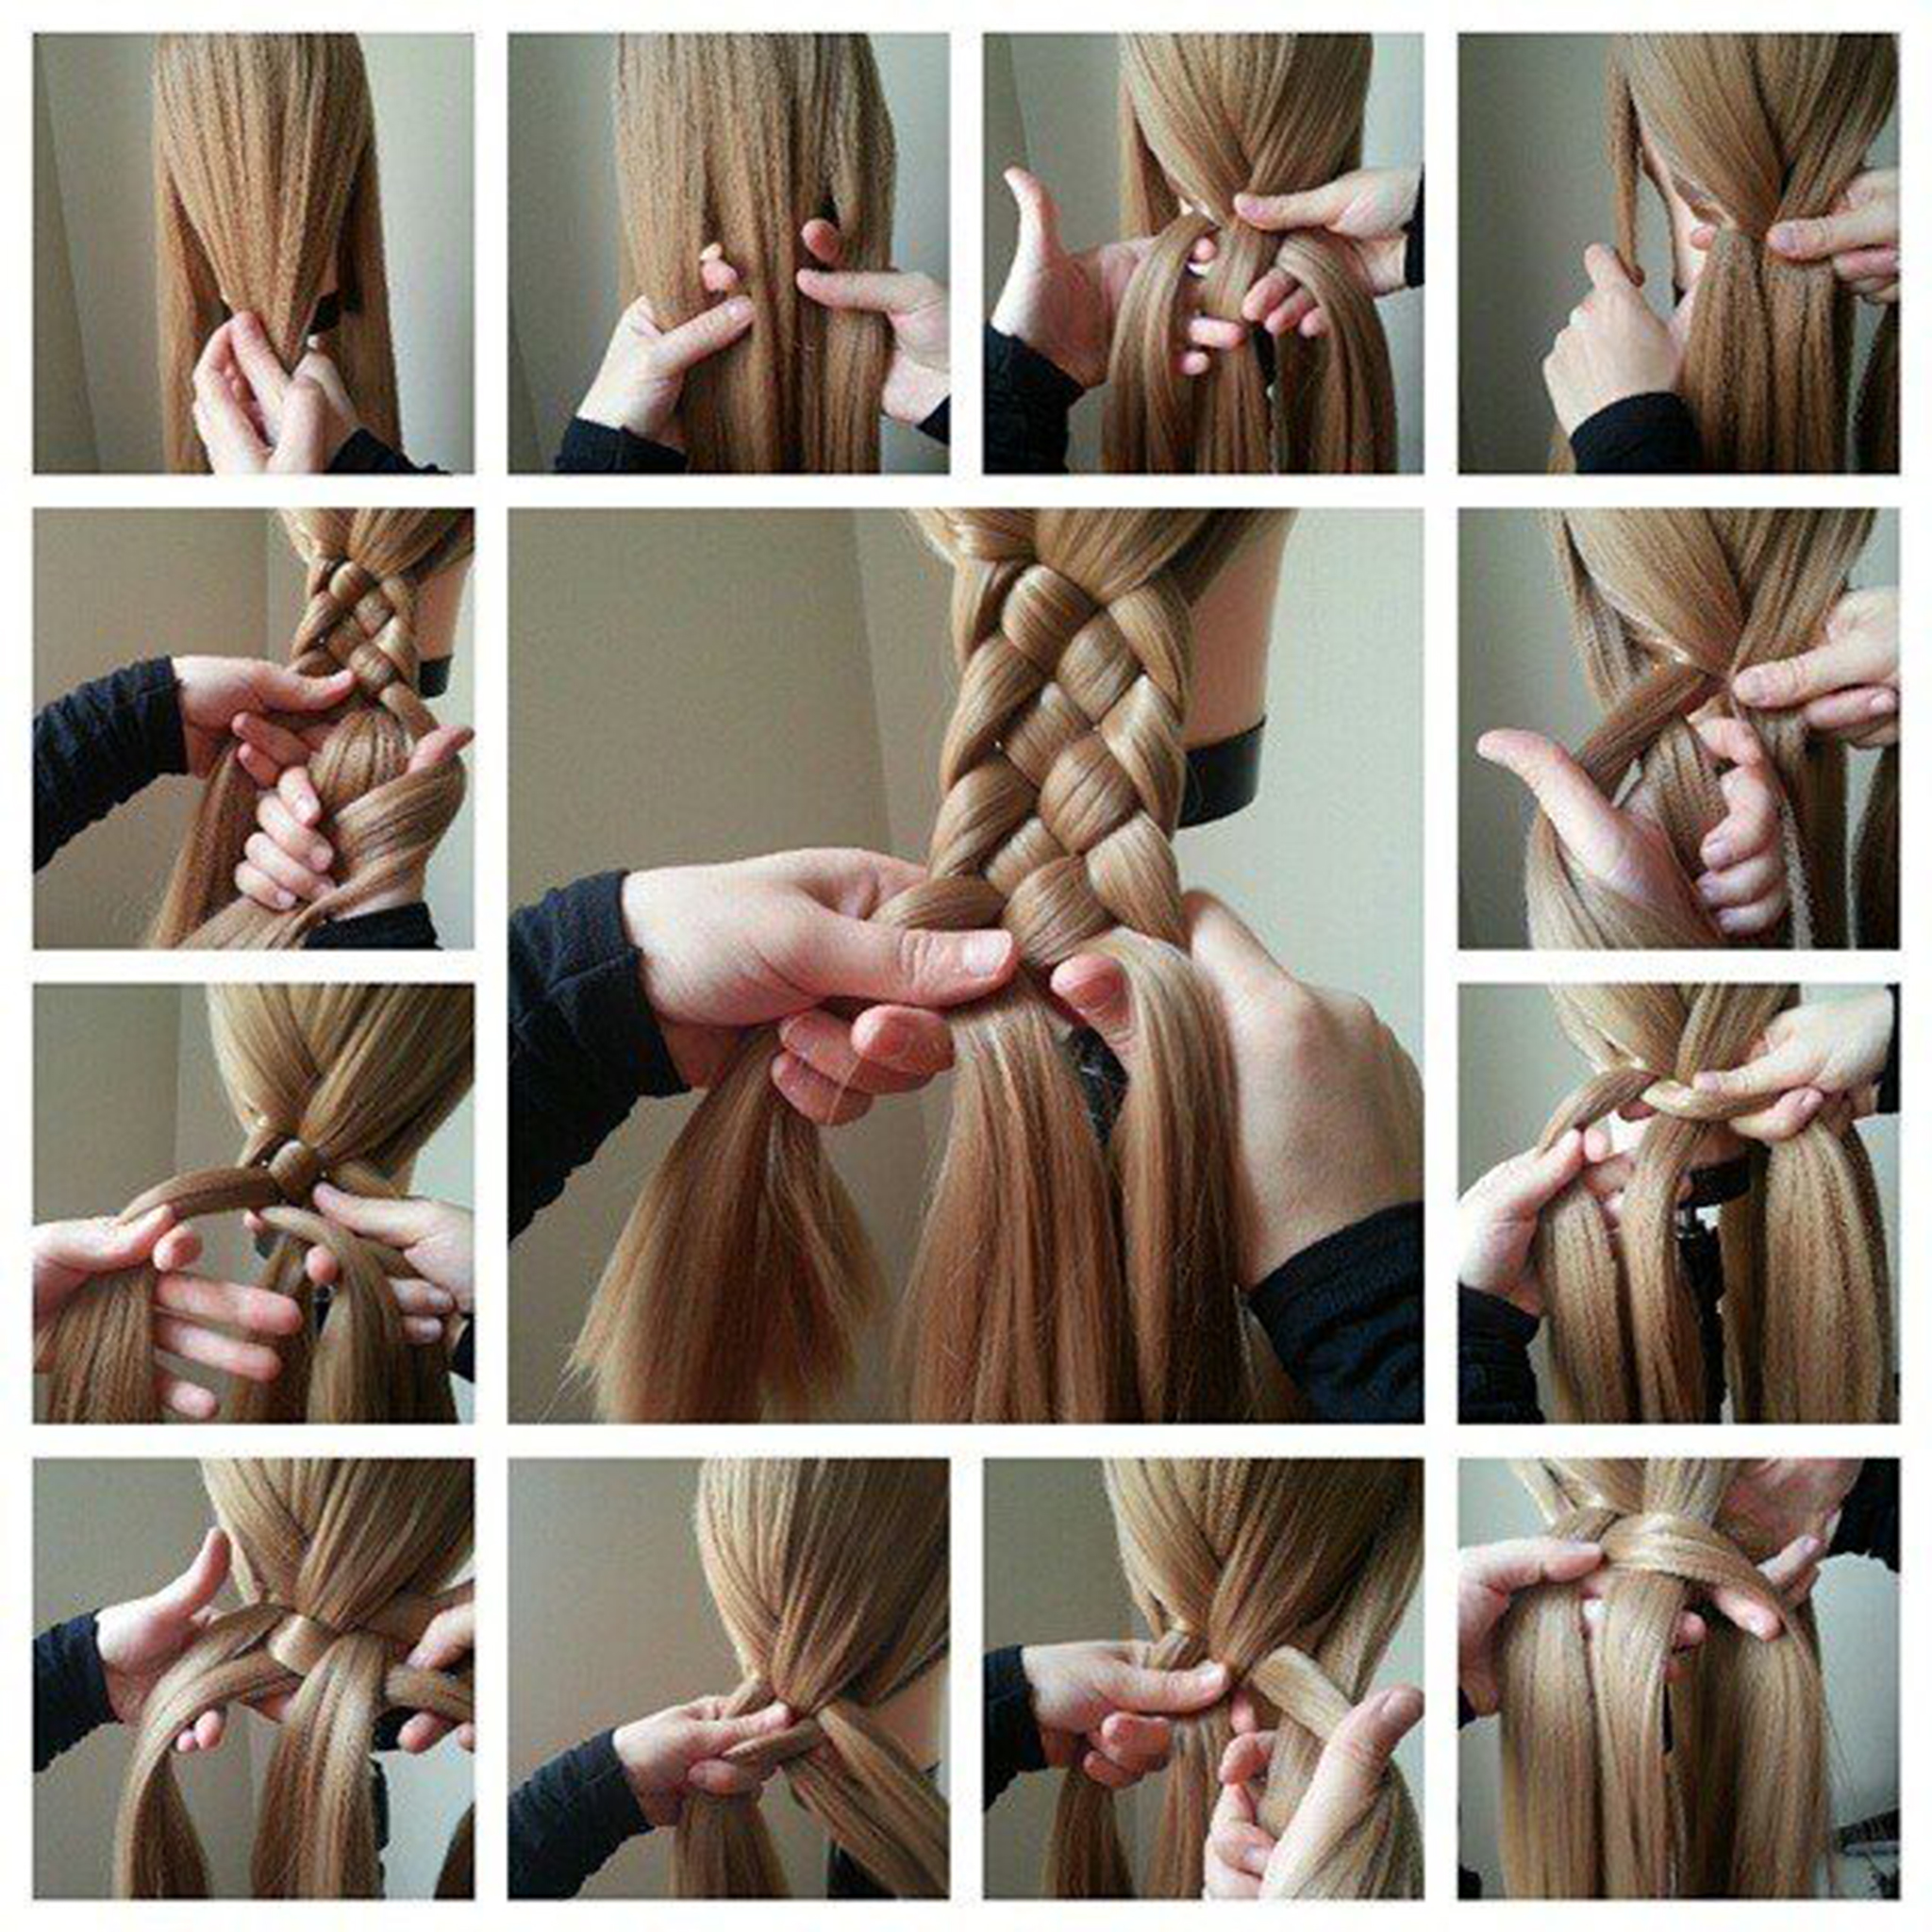
Braids have always been a timeless hairstyle choice, combining elegance and versatility, but the knotted braid takes the art to a whole new level. Its intricate patterns and effortless grace make it a showstopper for any occasion. Whether you’re strolling down the street or attending a glamorous party, it’s sure to turn heads.
This step-by-step guide will unravel the secrets behind creating the perfect knotted braid. Whether you’re a braiding novice or an experienced hairstylist, this tutorial will equip you with the knowledge and techniques needed to master this stunning hairstyle. So, get ready to embark on a braiding journey that will elevate your hairstyling skills and make you the envy of every gathering. Let’s dive in and unravel the art of the knotted braid, one knot at a time!
This step-by-step guide will unravel the secrets behind creating the perfect knotted braid. Whether you’re a braiding novice or an experienced hairstylist, this tutorial will equip you with the knowledge and techniques needed to master this stunning hairstyle. So, get ready to embark on a braiding journey that will elevate your hairstyling skills and make you the envy of every gathering. Let’s dive in and unravel the art of the knotted braid, one knot at a time!
Things You’ll Need:
1. Comb or brush
2. Texturizing spray or dry shampoo (optional)
3. Hair clips or ties
4. Clear elastics or decorative hair accessories
5. Hairspray or lightweight styling product
2. Texturizing spray or dry shampoo (optional)
3. Hair clips or ties
4. Clear elastics or decorative hair accessories
5. Hairspray or lightweight styling product

Step 1: Prepare your hair
It’s important to start with a solid foundation to achieve the perfect hairstyle. Begin by ensuring your hair is clean, dry, and brushed. Consider using a texturizing spray or dry shampoo for added grip to achieve a more voluminous and textured look.
Step 2: Divide the hair
Split your hair into four equal sections. You can use your fingers or a comb to create even sections. For simplicity, let’s label the sections as A, B, C, and D. You can use hair clips or hair ties to the sections separate the sections.
Step 3: Begin the braid
Take section A and cross it over section B. Then pass it under section C, and finally, bring it over section D. Section A will now become the rightmost section.
Step 4: Add hair to the braid
Take a small section of hair from section D and add it to the rightmost section of the braid. Cross the rightmost section over section C, then under section B, and finally over section A. The rightmost section becomes the leftmost section now.
Step 5: Repeat the process
Repeat step 4 by taking a small section of hair from section B and adding it to the leftmost section of the braid. Cross the leftmost section over section C, then under section D, and finally over section A. The leftmost section becomes the rightmost section.
Step 6: Continue braiding
Keep alternating between adding small sections of hair to the rightmost and leftmost sections of the braid while crossing them over the other sections. Each time you cross a section, remember to go over, then under, and finally over the next section.
Step 7: Tie the braid
Secure the braid using a hair tie when you’ve reached the end of your hair. You can use a clear elastic or a decorative hair accessory.
Step 8: Adjust and loosen
Gently pull on the loops and edges of the braid to adjust the tension and create a fuller look. This step will help define the individual strands and enhance the knot pattern.
Step 9: Finishing touches
To keep your braid in place, you can use hairspray or a lightweight hair styling product. Additionally, you can pull out a few face-framing strands or wisps of hair to soften the look and add a touch of femininity.

That’s it! You have now created a beautiful knotted braid hairstyle. Enjoy showcasing your new look!
